About your site
Link to WebEx training session:
https://kponline.webex.com/kponline/lsr.php?RCID=41940af5546f4c119f1a816fc65088d8
Logging into the WordPress admin panel
- Type in the site url: https://pharmacyresidency.kp.org and append the url with /wp-admin
Example: https://pharmacyresidency.kaiserpermanente.org/wp-admin - Type in your username and password
Resources
Adding a new page
- Page > Add New
- Name the page
- Publish the page
- Paste your content into the editor and do any necessary formatting such as adding headlines, sub-headlines paragraph breaks links and images.
- After any other edits click the Update button to save changes
Managing Pages
Pages can be edited and deleted under the Pages menu in the Dashboard
Adding a new job
- Job Listings > Add New
- Choose Back End Editor
- Click Add Template (yellow button)
- Select Program Opening (v 1.4)
- Mouse over each content area and click on the pencil icon to add content
- Select a Job Region
- Select a Job Category (Check either PGY1 or PGY2 and also select the sub category)
Managing Jobs
Jobs can be edited and deleted under the Pages menu in the Dashboard
Uploading and inserting images and documents
There are two ways of uploading images and documents to your site.
- Media > Add New
- Within the page edit view
Upload/Insert > choose file location >choose image > click Use this image - If you are adding an image by hand us the relative URL: /wp-content/uploads/images/…
Using naming conventions for images and documents will make it much easier to find and manage your assets.
Image naming conventions
region_city_01.jpg
example:
ncal_san_francisco_01.jpg
Document naming conventions
region_city_program_doctype.pdf
example:
ncal_san_francisco_pgy1_brochure.pdf
ncal_san_francisco_pgy1_open_house.pdf
Uploading and linking to documents
Get the file URL
After uploading files to the Media Library you can get the URL two ways.
- While still in the upload window, scroll down to File URL and copy this link
- After you upload a file go to Media >Library
- mouse over the file name you will see options to:
Edit | Delete Permanently | View - Click Edit
- On the Edit Media page select and copy the File URL
- mouse over the file name you will see options to:
Apply link
- Go to the page you want to add the link to
- In the Edit mode, select the Visual tab
- Select the text you wish to link to
- In the toolbar click on the link icon
- Paste the link into the URL field
- If this link is going to an external website check the Open link in a new window/tab box
- Click the Add link button
- All linked documents should always be pdfs
Adding document icons
To create a link to a document with a document icon you will need to add the following code to the page. In edit mode chose the text view and paste in the following code. You will need to update the link to link to the correct document.
<ul class=”docs”>
<li style=”list-style-type: none;”>
<ul class=”docs”>
<li class=”pdf”><a href=”http://pharmacyresidency.kaiserpermanente.org/wp-content/uploads/2017/09/Residency-Brochure_9.17v.2.pdf”>Program Brochure</a></li>
</ul>
</li>
</ul>
Menus (Navigation)
The site navigation can be added/edited under Appearance > Menus
- Select the menu you wish to edit under the top drop down menu
- You can add pages, move pages, rearrange the page structure or rename pages here.
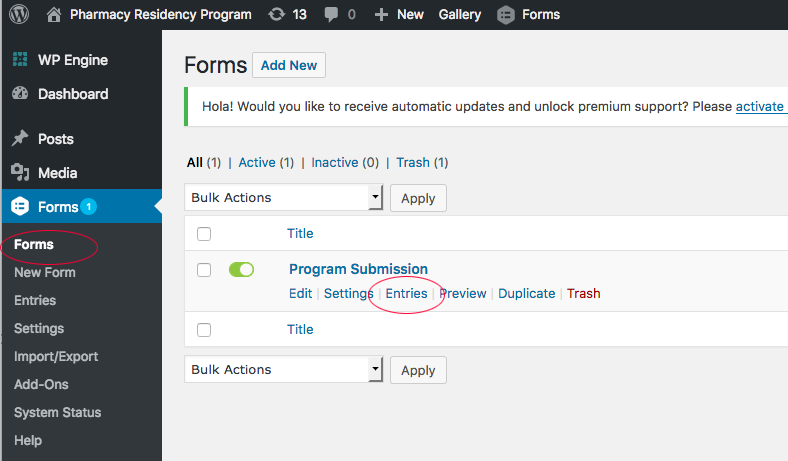
Program Submission Form Entries
- To view entries navigate to to Forms under Forms in the left navigation
- Mouse over the Program Submission form and click on Entries (view image)
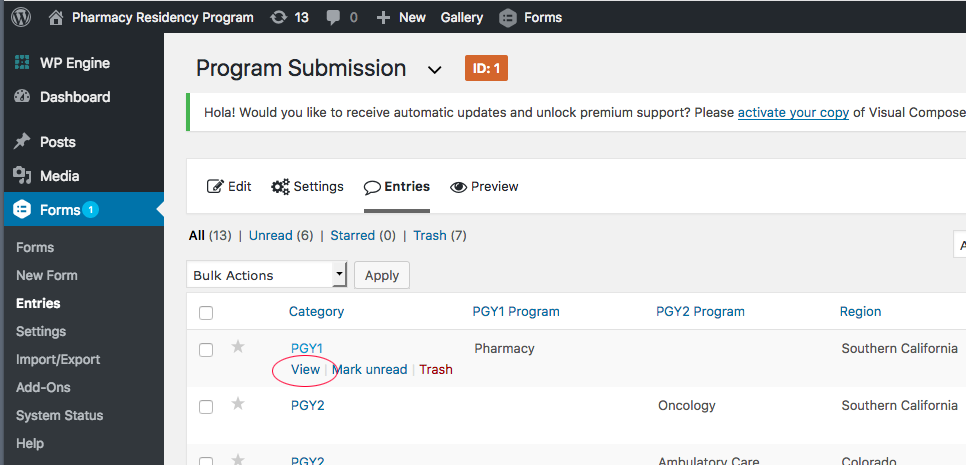
- On the Entries page you can view each form submission. To view the entries, mouse over the Category and click on view (view image)
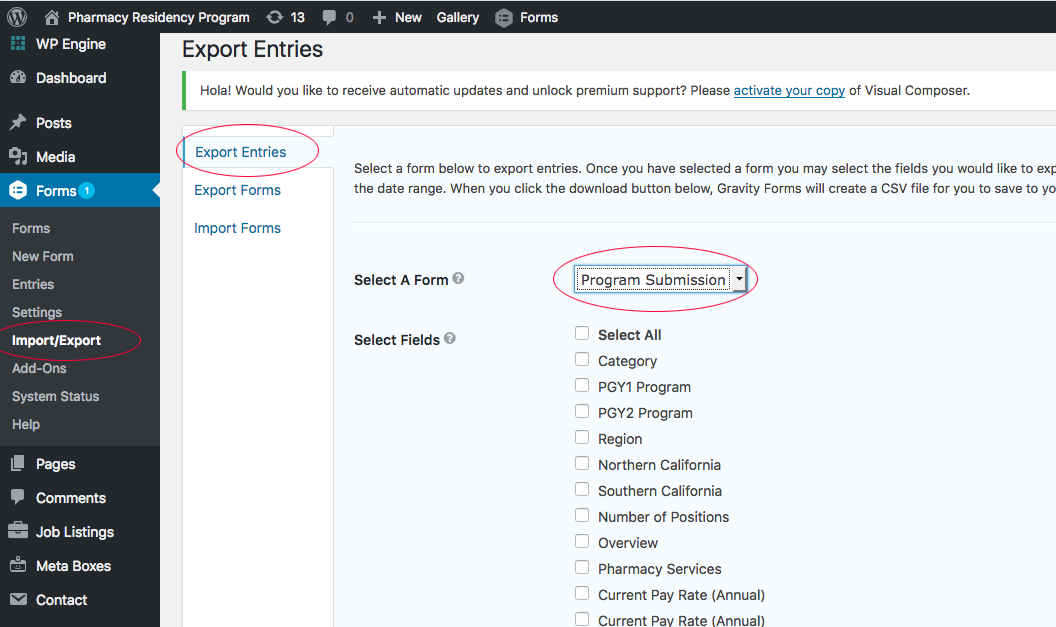
- To export all submissions as a CSV file click on Import/Export under Forms, select Export Entries, select the form and then check the fields that you would like to include in the export (view image)